Considering dental implants in Greenville, SC means weighing practical facts—cost, candidacy, timeline, and who will place your implants—so you make a confident decision that fits your health and budget. Implants can restore function and appearance long-term, but success depends on your jawbone health, overall medical profile, and choosing an experienced local specialist.
This article walks you through what makes you a good candidate, what the procedure and recovery typically involve, how much you can expect to invest (and finance), and how to minimize risks while maximizing longevity. You’ll learn how to pick the right provider in Greenville, what to expect day-to-day during healing, and how aftercare affects the lifespan of your new teeth.
Table of Contents
ToggleUnderstanding Dental Implant Candidacy
You need enough general health stability, jaw bone to support an implant, and lifestyle factors that won’t compromise healing. These three areas determine whether your dentist will recommend implants now, after preparatory treatment, or suggest alternatives.
Health Considerations
Your overall medical status directly affects implant success. Conditions such as uncontrolled diabetes, autoimmune disorders, and recent cancer treatment increase infection and poor-healing risk.
Bring a current list of medications—blood thinners, bisphosphonates, and some immunosuppressants require special planning or coordination with your physician. Oral health matters too.
Active gum disease must be treated before implant placement. Your dentist will evaluate pocket depths, bleeding, and infection signs; untreated periodontitis raises the chance of implant failure.
Be prepared to provide recent medical records and lab results when requested. Clear communication between your dentist and your medical providers improves safety and timing for surgery.
Bone Density Requirements
Implants need sufficient jaw bone height and width where the tooth will go. Your dentist will use a CBCT scan or dental X-rays to measure bone volume and quality—thin ridges or low density often require grafting, sinus lifts, or use of narrower implants.
If you have had missing teeth for years, bone resorption is common. A graft can rebuild adequate support, but it adds months to treatment and increases cost.
Expect graft types like autograft, allograft, or synthetic materials; your clinician will explain which fits your situation. Bone health also ties to systemic factors—osteoporosis and certain medications can reduce bone quality.
Your dentist will review bone-specific medical history and may consult your physician before proceeding.
Age and Lifestyle Factors
Age alone rarely disqualifies you; many seniors receive implants successfully if health and bone are adequate. Focus on functional goals: chewing comfort, speech, and long-term maintenance.
Younger patients still growing (rare in late teens) may need to wait until growth stabilizes. Lifestyle choices affect healing and long-term outcomes.
Smoking doubles or triples the risk of complications and delays healing; quitting before surgery improves success rates. Heavy alcohol use and poor nutrition also impair recovery.
Commitment to oral hygiene and regular dental visits matters. Implants require daily cleaning and professional checkups—if you cannot maintain these habits, discuss alternative restorations with your dentist.
Procedure Overview and Timeline
You can expect a multi-step process that includes an evaluation with imaging, a guided surgery to place the implant(s), and months of bone healing before the final crown is attached. Each phase has specific appointments, typical durations, and recovery expectations.
Initial Consultation Steps
Your first visit includes a clinical exam, full-mouth X-rays, and a CBCT scan when needed to map bone volume and nerve locations. The dentist reviews medical history, medications, and any chronic conditions that affect healing, such as diabetes or smoking.
Expect treatment planning to cover implant type, number of implants, need for tooth extractions or bone grafting, and cost/insurance estimates. You’ll receive a written timeline with estimated dates for surgery and restoration, plus pre-op instructions about antibiotics, fasting, or stopping certain medications.
Ask about sedation options (local, nitrous oxide, oral sedative, IV) and who will perform the surgery—general dentist, oral surgeon, or periodontist. Get clear answers on how many visits each step will take and what follow-up imaging is planned.
Surgical Phase Details
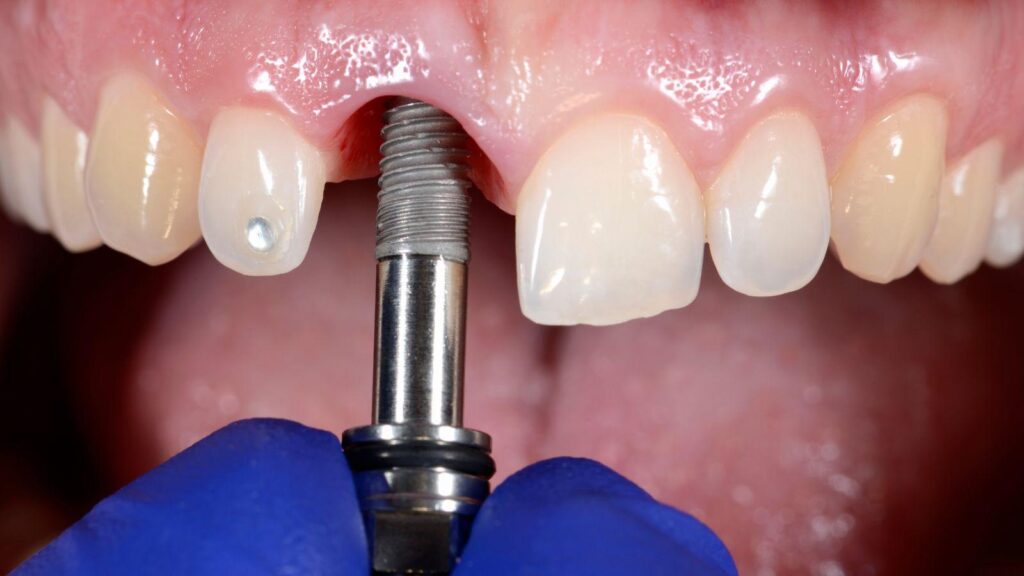
On surgery day the surgeon places a titanium implant into your jawbone through a small incision in the gum. The procedure usually takes 30–90 minutes per implant depending on complexity and any simultaneous bone grafting or tooth extraction.
You will receive local anesthesia; many patients also choose sedation. After implant placement the surgeon may attach a healing cap or place a cover screw and stitch the gum closed.
Expect mild-to-moderate swelling and soreness for 3–7 days; pain is usually controlled with prescription or OTC analgesics. If immediate temporary teeth are possible, the clinic will explain load-bearing limits.
You’ll get post-op care instructions, an emergency contact, and a follow-up visit scheduled for suture removal and healing checks.
Healing and Osseointegration Process
Osseointegration is the 3–6+ month period during which bone bonds to the implant surface, creating a stable foundation. Healing time varies by bone quality, implant location (lower jaw often integrates faster than upper), and whether you had grafting.
You’ll have periodic check-ups and possibly repeat X-rays to confirm bone growth and implant stability. If a two-stage approach was used, the second minor surgery exposes the implant and places an abutment; if a one-stage approach was used, the abutment may already be present.
Once the implant is stable, your dentist takes impressions for the final abutment and crown. Maintain meticulous oral hygiene and follow dietary restrictions during integration to reduce the risk of infection or implant failure.
Selecting the Right Dental Specialist
You should pick a provider who combines proven surgical skill with up-to-date technology and predictable treatment planning. Focus on measurable credentials, documented case results, and the tools they use to assess and place implants.
Qualifications and Experience
Verify that the clinician is a licensed dentist with additional training in implant dentistry—look for residencies or fellowship training in oral surgery, periodontics, or prosthodontics. Ask how many implant cases they’ve completed in the last year and request before-and-after photos of similar cases to yours.
Confirm board certifications or membership in recognized professional organizations (e.g., American Academy of Implant Dentistry). Check whether they perform the full treatment in-office or refer parts of it; continuity of care often improves outcomes.
Also ask about complication rates and how they manage infections, failed implants, or grafting complications. Bring records of any medical conditions or medications you take.
Experienced specialists will review these, explain how systemic health affects healing, and outline a personalized timeline for extractions, grafts, and implant placement.
Technology and Techniques Used
Prioritize clinics that use cone beam CT (CBCT) scans for 3D treatment planning. CBCT lets the specialist evaluate bone volume, nerve positions, and sinus anatomy, reducing surgical surprises and enabling precise implant positioning.
Ask whether they use guided-surgery stents, digital impressions, and CAD/CAM-fabricated restorations. These technologies increase fit accuracy and often shorten chair time.
Inquire about the implant brands and systems they favor; reputable systems have long-term data and readily available parts for repairs. Probe their grafting techniques and materials—autograft, allograft, xenograft, or synthetic—and whether they offer immediate loading or prefer staged healing.
Clear answers about imaging, surgical guides, and prosthetic workflows show a practice that prioritizes predictable, evidence-based care.
Cost Factors and Financing Options
You’ll face a mix of fixed and variable costs, plus several financing routes if you need monthly payments. Know the typical price drivers and the common payment options available in Greenville so you can plan treatment and budget accurately.
Breakdown of Expenses
Implant treatment commonly includes several line items: consultation and imaging (CBCT or X‑rays), the implant fixture (titanium or zirconia), the abutment, and the final crown or prosthesis. Single-tooth implants in the U.S. often range widely; ask your Greenville provider for a written estimate that separates each component.
Other cost drivers you’ll encounter: bone grafting or sinus lifts if bone volume is insufficient, extractions, sedation or anesthesia fees, and follow‑up visits. Lab fees for custom prosthetics and the surgeon’s experience level also affect price.
Request itemized quotes and compare at least two clinics to see where savings or added value occur.
Insurance and Payment Plans
Dental insurance rarely covers the full implant cost, but some plans may offset portions (e.g., crown or extraction). Confirm with your insurer whether implants are covered as restorative or considered elective in your policy, and get preauthorization when possible.
Financing options in Greenville typically include CareCredit or similar healthcare credit cards, in‑house payment plans with 3–12 month terms, and third‑party personal loans. You can also use HSA/FSA funds for qualified dental expenses to reduce out‑of‑pocket cost.
Ask clinics about interest rates, monthly payment amounts, and any required down payment before committing.
Expected Results and Longevity
You can expect a natural-looking replacement that restores chewing function and a long-term solution if you maintain oral health and attend follow-ups. Success depends on bone quality, implant placement, and your daily care habits.
Aesthetic Outcomes
Implant crowns match neighboring teeth in shape, color, and surface texture when your dentist uses shade-matching and custom lab work. Porcelain or zirconia crowns resist staining better than composite; ask which material your Greenville provider plans to use.
Soft-tissue contouring around the implant creates a natural gum line. Expect initial swelling after surgery, then gradual settling of the gum margin over weeks to months.
If you have thin gingival biotype or significant gum recession, discuss connective tissue grafts to improve long-term aesthetics. Photographs and digital scans let you preview results.
Insist on before-and-after photos of similar cases and a mock-up or temporary crown to confirm appearance and bite before final restoration.
Durability and Maintenance
Titanium and zirconia implants commonly show survival rates above 90% at 10 years in well-maintained patients, but outcomes vary by smoking, diabetes control, and bone density. Poor oral hygiene and untreated periodontal disease increase the risk of peri-implantitis and implant failure.
Daily brushing with a non-abrasive brush and interdental cleaning (floss, water flosser, or interdental brushes) removes biofilm around the implant-abutment junction. Schedule professional cleanings every 3–6 months based on your risk profile so clinicians can remove calculus and check for bone loss on radiographs.
Avoid using implants as anchors for heavy bruxism without a nightguard. If you clench or grind, a custom occlusal guard reduces stress and helps preserve the implant, crown, and surrounding bone.
Potential Risks and Complications
You may experience short-term discomfort, and a small percentage of patients face longer-term problems such as infection or implant failure. Knowing specific signs, timelines, and management steps helps you act quickly and protect your oral health.
Common Side Effects
Expect swelling, bruising, and mild bleeding for 48–72 hours after surgery. These signs are normal and usually controlled with ice, prescribed pain medication, and limited activity.
Temporary numbness or tingling can occur if a nerve near the implant site is irritated; report persistent altered sensation beyond two weeks. Minor soreness around adjacent teeth and gums is common as tissues adapt to the implant and temporary restorations.
Less common but important issues include failure of osseointegration (implant not bonding to bone), which typically appears within the first few months as mobility or pain. Peri-implantitis—gum inflammation around the implant—can develop later and looks like redness, bleeding, pus, or worsening bone loss.
Managing Post-Procedure Issues
Follow your clinician’s instructions for oral hygiene and antibiotic use to reduce infection risk. Rinse gently with saline or a prescribed antimicrobial rinse, avoid smoking for at least 72 hours (longer if possible), and attend scheduled follow-ups for healing checks and x-rays.
If you notice increasing pain, fevers, persistent swelling after 72 hours, or any pus, contact your dentist immediately; these are signs of infection or early failure. For numbness or altered sensation beyond two weeks, request an urgent evaluation—nerve involvement may require imaging and specialist intervention.
If an implant shows mobility or radiographic bone loss, treatment options range from non-surgical cleaning and antibiotics to surgical debridement or implant removal and replacement after bone grafting. Keep records of medications and procedures so specialists can make timely, informed decisions.
Aftercare and Long-Term Oral Health
Expect specific daily steps right after surgery and a predictable schedule of checks and hygiene to protect the implant for years.
Post-Surgery Care Instructions
You will get a prescription or recommendation for pain control and antibiotics; take them exactly as directed. Use ice packs for the first 24 hours to reduce swelling—20 minutes on, 20 minutes off—and sleep with your head elevated the first two nights.
Rinse gently with warm salt water starting 24 hours after surgery, 3–4 times daily, especially after meals. Avoid vigorous spitting or using a straw for 7–10 days to protect the blood clot and the implant site.
Stick to soft foods for at least 7–10 days. Examples: mashed potatoes, Greek yogurt, scrambled eggs, and smoothies (no straw).
Avoid crunchy, sticky, or hard foods that place pressure on the implant during early healing. Brush adjacent teeth normally but use a soft toothbrush near the surgical site for 1–2 weeks.
Your dentist may provide a chlorhexidine rinse—use it only as instructed. Report fever, increasing pain, excessive bleeding, or pus to your dentist immediately.
Maintaining Implant Health Over Time
Daily oral hygiene prevents plaque buildup around the implant and reduces risk of peri-implantitis. Brush twice daily with a low-abrasive toothpaste and a soft or electric brush.
Floss once daily using floss designed for implants or an interdental brush sized to the gap. Schedule professional cleanings and implant checks every 3–6 months for the first year.
After the first year, visit your dentist at least every 6–12 months depending on their advice. These visits let your clinician check bone levels, the crown fit, and soft-tissue health.
Avoid smoking; tobacco markedly increases implant failure risk. Control systemic factors like diabetes and follow your physician’s guidance to keep blood sugar within target ranges.
If you grind or clench, ask about a night guard to prevent excessive force on the implant. Quickly address loose crowns, mobility, or persistent swelling—early intervention preserves the implant and surrounding bone.