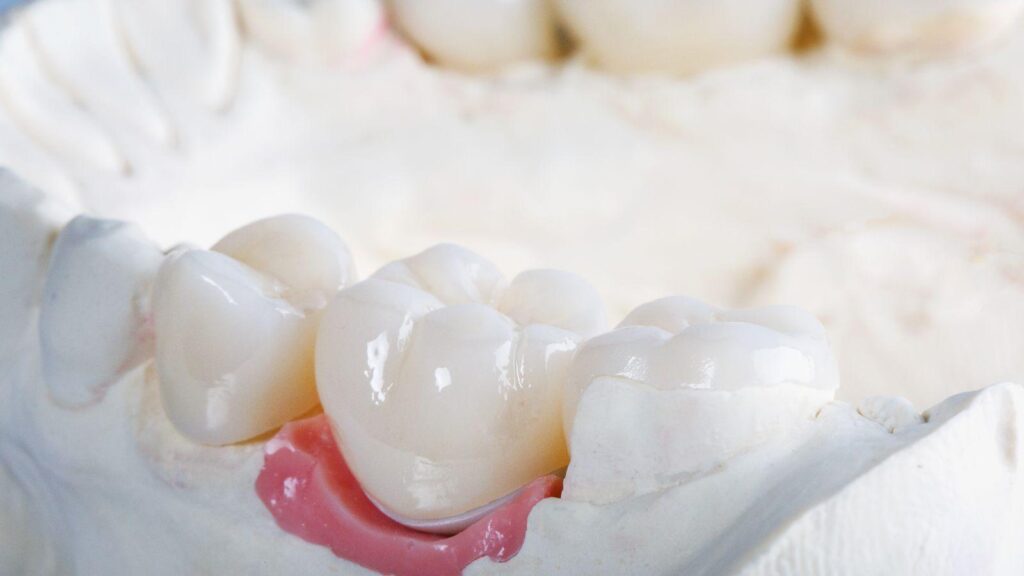
Combining veneers, whitening, and implants can transform how you look and function by addressing color, shape, and missing teeth together. These treatments, when planned and sequenced correctly, give you a cohesive, natural-looking smile that balances aesthetics and long-term dental health.
You’ll learn how veneers refine tooth shape, whitening sets the color standard, and dental implants in Wilmington, NC provide stable support for teeth that are missing or beyond repair. The article will walk through treatment sequencing, design choices, maintenance, costs, and common challenges so you can weigh options and plan a smile makeover that fits your goals.
Table of Contents
ToggleUnderstanding Dental Veneers
Veneers change the visible surface of teeth to correct color, shape, or minor alignment issues. They vary by material, application method, and lifespan, so choose based on your goals, budget, and the condition of your natural teeth.
Types of Veneers
You will encounter three common veneer types:
- Porcelain veneers: Made from high-strength ceramic, they mimic natural enamel translucency and resist staining. They require 2–3 visits—preparation, impression, and final cementation—and are best when you want a long-lasting, natural look.
- Composite veneers: Built from tooth-colored resin either directly in the mouth or lab-fabricated and bonded. They cost less, can often be completed in one visit, and are easier to repair but stain and wear faster than porcelain.
- No-prep/ultra-thin veneers (e.g., Lumineers): Require minimal or no enamel removal. They preserve more tooth structure but may produce a slightly bulkier appearance and are not suitable for significant color or shape corrections.
Consider enamel thickness, bite forces, tooth position, and whether you clench or grind when selecting a type. Your dentist will evaluate photos, X-rays, and impressions to recommend the best material for predictable results.
Procedure Overview
The typical porcelain veneer pathway follows clear steps you should expect.
- Consultation and planning: Digital photos, shade matching, and diagnostic mock-ups show the expected result.
- Tooth preparation: Your dentist usually removes 0.3–1.0 mm of enamel to create space for the veneer and ensure a seamless margin.
- Impression and temporary veneers: The lab receives an impression; you may wear temporaries while the permanent pieces are made.
- Bonding appointment: Teeth are cleaned, etched, and a resin cement is used to bond the veneer. The dentist adjusts bite and contours before final curing.
Composite veneers may be completed directly without a lab. No-prep veneers skip or minimize enamel reduction.
Expect local anesthesia for preparation visits. Allow 1–3 weeks between prep and final cementation for lab-fabricated restorations.
Longevity and Durability
Veneer lifespan depends on material, technique, and your habits.
- Porcelain veneers: Typically last 10–15+ years with proper care. They resist staining and retain shape well.
- Composite veneers: Often last 5–7 years and may need more frequent touch-ups or polishing.
- No-prep veneers: Longevity sits between composite and traditional porcelain, influenced heavily by case selection.
Protect your investment by avoiding hard foods, not using teeth as tools, wearing a nightguard if you grind, and maintaining regular dental hygiene and recall visits. Repair is possible for chips and debonds, but complete replacement may be necessary if underlying decay or margin failure occurs.
Teeth Whitening Techniques
You’ll learn which professional and at-home options deliver predictable shade changes, how long effects typically last, and which dental restorations do or do not respond to bleaching.
In-Office Whitening Options
In-office whitening uses stronger peroxide gels (typically 15–40% hydrogen peroxide or equivalent) applied by a dentist for faster, controlled results. Treatments usually take 45–90 minutes per session and often produce 6–10 shade improvements in one visit.
Dentists isolate soft tissues and may use lights or lasers, though light activation mainly aids patient perception rather than dramatically increasing whitening. Multiple short applications of gel with chairside monitoring reduce sensitivity and uneven outcomes.
Expect one to three appointments for severe staining or deeper intrinsic discoloration. Professionals manage sensitivity with desensitizing agents and can coordinate whitening before veneers or crowns so restorations match the final tooth shade.
At-Home Whitening Methods
At-home options include custom trays with lower-concentration peroxide gel (10–22% carbamide or 3–10% hydrogen peroxide), over-the-counter (OTC) strips, and toothpaste with mild abrasives or peroxide. Custom trays from your dentist provide the most even, safe results among home methods and typically require nightly wear for 1–2 weeks.
OTC strips can brighten by several shades but fit and coverage vary, producing less predictable results than custom trays. Whitening toothpaste removes surface stains but won’t change intrinsic color significantly.
Use trays or strips according to manufacturer or dentist instructions to limit gum irritation and sensitivity. Stop use and consult your dentist if you develop persistent pain, blistering, or uneven whitening.
Whitening Limitations
Bleaching only affects natural tooth structure; it does not change the color of porcelain, composite, or implant crowns. If you plan veneers, crowns, or implant restorations, whiten natural teeth first so the dentist can match restoration shade to the post-whitening color.
Intrinsic stains from tetracycline, fluorosis, or large restorations often respond poorly to bleaching alone and may require veneers or bonding for esthetic correction.
Results vary by stain type, baseline shade, and patient habits (smoking, coffee, red wine). Maintenance typically requires occasional touch-ups—at-home trays or OTC products—and expect gradual relapse over months to years depending on diet and oral hygiene.
Implants as a Foundation
Dental implants provide the structural support for crowns, bridges, and adjacent veneers. Their position, material, and healing affect final shade, contour, and bite.
Proper planning and maintenance ensure implants integrate predictably and support long-term cosmetic goals.
Dental Implant Basics
A dental implant is a titanium or titanium‑alloy screw placed into the jawbone to replace a missing tooth root. After placement, the bone grows around the implant (osseointegration), creating a stable base for a crown or bridge.
You should know the three main parts: the implant (root), the abutment (connector), and the restoration (crown). Implant dimensions — diameter and length — depend on your bone volume and the space for the final tooth.
Placement can be single-stage (abutment exposed) or two-stage (covered during healing). Healing typically takes 3–6 months, longer in bone-grafted sites.
Smoking, uncontrolled diabetes, and poor oral hygiene increase the risk of failure.
Implant Selection Process
Your dentist selects implants based on jawbone quality, nearby anatomical structures, and the type of restoration you want. They use CBCT scans and digital planning to determine implant angulation, depth, and diameter.
If you have insufficient bone, options include bone grafting, ridge augmentation, or using narrow/short implants. For front‑tooth aesthetics, your clinician prioritizes implant position and soft‑tissue support to achieve a natural emergence profile.
Material and connection type matter: titanium is common; zirconia implants offer an alternative for metal‑sensitive patients. Internal connection designs often provide better prosthetic stability and easier future maintenance.
Post-Procedure Care for Implants
Immediately after surgery, follow instructions for medication, ice, and soft foods to minimize swelling and protect the surgical site. Avoid chewing directly on the implant area until your clinician clears you.
Maintain thorough but gentle oral hygiene: brush with a soft brush, use interdental brushes sized for the implant spacing, and rinse with prescribed antimicrobial rinses. Regular professional cleanings every 3–6 months help monitor tissue health and remove plaque around the implant.
Watch for signs of trouble: persistent pain, loosening, increasing redness, or pus require prompt evaluation. If you smoke, quit or reduce drastically; smoking impairs healing and raises the risk of implant failure.
Sequencing Cosmetic Procedures
You will plan treatments so restorations and whitening match and implants are placed when tissues are healthy. Timing affects esthetic predictability, healing, and final shade matching.
Recommended Order of Treatments
Start with any necessary restorative work: treat decay, root canals, or periodontal disease first so your mouth is healthy before cosmetic steps. Replace missing teeth with implants or provisional bridges next if bone grafting or implant placement is required.
Allow implants and grafts to integrate before finalizing adjacent restorations; this usually means waiting months for osseointegration. After structural work, do whitening to set the target tooth shade — whitening can alter natural tooth color but not porcelain.
Place veneers, crowns, and final implant restorations last, matched to post‑whitening shades for cohesive results. Use provisional restorations throughout when you change shape or position of front teeth.
Provisionals let you test esthetics and function and guide final lab work.
Timeframes and Healing Considerations
Anticipate 4–12+ weeks for soft‑tissue healing after extractions or grafts before implant placement is safe. If you place an implant immediately, expect a provisional phase of 3–6 months while bone integrates and soft tissue stabilizes.
Whitening typically takes 1–4 weeks depending on the method; perform it after soft tissues have settled but before final restorations are delivered. Veneer or crown preparation and lab fabrication usually require 2–4 weeks.
Plan follow‑up visits at 1 week, 4–6 weeks, and 3–6 months after major procedures to monitor healing, adjust provisionals, and confirm shade and margin stability before final seating.
Achieving Aesthetic Harmony
A cohesive smile comes from matching color, shape, and proportion across veneers, whitening, and implants. Precise planning, shade communication, and staged treatment keep results natural and balanced.
Color Matching Between Treatments
You should start with professional whitening if natural teeth will remain alongside veneers or implant crowns. Whitening sets the baseline shade; veneers and crowns are then fabricated to match that stable color.
Communicate a specific shade target using a shade guide (e.g., VITA codes) and digital photos under consistent lighting. Ask your dentist to document the chosen shade in the treatment plan and on lab prescriptions.
For implants, zirconia or porcelain crowns can be layered to mimic translucency. Request a try-in or a temporary crown so you can confirm color in your mouth before final glazing.
If whitening follows restorations, understand that restorations won’t change color — they’ll need replacement to match bleached teeth.
Balancing Shape and Proportion
You should evaluate tooth proportions relative to your face and lip line; length-to-width ratios around 0.75–0.85 for central incisors often look natural but adjust for your features. Use digital smile design or mock-ups to preview changes before irreversible work begins.
Veneers can alter contour and alignment; make sure implant crowns match the planned arch form and occlusion. Ask for a wax-up or temporaries to test how new shapes affect bite and speech.
Focus on transitions: margin placement, gingival contours, and contact point locations must flow smoothly between natural teeth, veneers, and implant restorations. Request that your dentist coordinates with the lab on microtexture and finish so light reflects consistently across all restorations.
Personalized Smile Design Planning
You will get a tailored plan that maps cosmetic goals to concrete steps, costs, and timelines. The plan centers on tooth position, shade selection, gum contour, and whether implants, veneers, or whitening best solve each concern.
Digital Smile Preview Tools
Digital previews use intraoral scans, photos, and facial measurements to create a mockup of your proposed smile. You can see proposed tooth shape, length, and shade in relation to your lips and facial proportions before any irreversible work begins.
Common tools include 3D rendering software and 2D photo simulations. Ask to review side-by-side comparisons: current state, proposed veneers, proposed whitening result, and implant-supported restorations.
Request measurements like midline, gingival zeniths, and incisal edge positions so you understand the technical basis of design choices.
Digital previews also help set realistic expectations. They show limitations—such as how whitening affects existing restorations—and highlight when staged treatment (whitening first, then veneers) yields better match and longevity.
Patient Consultation Strategies
Start consultations with a focused intake: list your cosmetic priorities, note any tooth sensitivity or gum issues, and bring recent photos of your smile. Expect a full exam including radiographs, periodontal assessment, and bite analysis to determine suitability for veneers or implants.
Discuss sequence and timing: whitening usually precedes shade-matched restorations; implants require healing time and may need provisional teeth. Get a written plan that includes estimated costs, number of visits, and maintenance requirements for veneers and implants.
Insist on seeing before-and-after cases for the exact procedures you’ll receive. Clarify warranty or repair policies for veneers and implant crowns.
Confirm financing or insurance steps, and schedule a follow-up to finalize shade, shape, and any provisional restorations.
Maintenance for Lasting Results
Protect veneers, implants, and whitening by committing to precise daily care and regular professional checkups. Focus on cleaning techniques, diet choices, and scheduled visits to preserve appearance and function.
Daily Oral Hygiene
Brush twice daily with a soft-bristled brush and non-abrasive fluoride toothpaste to avoid scratching veneers or wearing implant crowns. Use 2 minutes per session and reach all surfaces; pay special attention to the gumline where plaque accumulates around implants and crown margins.
Floss once daily using waxed floss or a floss threader to clean under implant restorations and between tight veneer contacts. Consider interdental brushes (size chosen to fit without force) for wider spaces and to clean around implant abutments.
Rinse with an alcohol-free, anti-microbial mouthwash if your dentist recommends it; this reduces bacterial load without drying tissues. Avoid whitening toothpastes or abrasive powders on veneers and recent composite bonding.
Limit staining foods and acidic drinks, and use a straw for beverages that can stain.
Professional Care and Follow-Up
Schedule a professional cleaning every 3–6 months based on your dentist’s recommendation; implants and full-mouth restorations often need more frequent maintenance. During visits, the hygienist will use non-abrasive instruments around veneers and implant surfaces to remove plaque and tartar safely.
Have routine exams that include bite checks and X-rays as directed—usually annually for implants—to monitor bone levels and crown fit. Report any sensitivity, loosening, chips, or color changes immediately so your dentist can repair or adjust restorations before problems worsen.
Discuss a personalized recall plan: polishing schedules, touch-up whitening intervals (if you maintain whitening), and nightguard prescriptions if you grind teeth. Keep records of materials and shade information to streamline future repairs or replacements.
Potential Challenges and Solutions
You may face tooth sensitivity, gum inflammation, or untreated decay and infection when planning whitening, veneers, and implants together.
Each issue requires targeted management to protect results and oral health.
Managing Sensitivity
Sensitivity commonly increases after whitening and after enamel preparation for veneers. You may notice sharp, short pain to cold or sweet stimuli; this often peaks within 48–72 hours after whitening and can persist if dentin is exposed during veneer prep.
Treatments you can expect include:
- Desensitizing toothpaste (potassium nitrate or stannous fluoride) used twice daily.
- In-office fluoride varnish or varnish applications at follow-up visits to seal dentinal tubules.
- Night guards if you grind; reducing wear helps prevent sensitivity from exposed dentin.
If sensitivity follows veneer preparation, your dentist may use temporary restorations or adhesive liners to protect the tooth while laboratory work proceeds.
Persistent or worsening pain warrants prompt evaluation for pulpal inflammation or cracked tooth, which may require endodontic treatment.
Addressing Gum Health
Healthy gums are essential for predictable veneer margins and implant success. You must have inflammation-free tissue, normal probing depths, and control of bleeding before definitive veneers or implant placement.
Your dentist will likely recommend:
- Professional scaling and root planing if pockets or calculus are present.
- Improved home care: timed brushing with a soft brush, interdental brushes, and daily flossing tailored to your anatomy.
- Periodontal recontouring or crown lengthening when excessive gingival display or asymmetric gingival margins would compromise aesthetics.
For implants, your clinician will ensure at least 2 mm of keratinized tissue around planned sites or graft tissue where needed.
Untreated periodontitis increases implant failure risk, so maintenance visits every 3–6 months may be required before and after treatment.
Treating Existing Dental Issues
You must address caries, failing restorations, cracked teeth, and active infection before cosmetic work.
Leaving these problems untreated undermines longevity and can lead to complications after veneers or implants.
Typical steps include:
- Remove decay and place definitive restorations or crowns where structural loss is significant.
- Root canal therapy for teeth with irreversible pulpitis or necrosis prior to placing veneers over compromised teeth.
- Extraction and delayed implant placement when a tooth cannot be saved; socket preservation or bone grafting may be needed to maintain ridge volume.
Your treatment plan should sequence interventions logically: resolve infection, stabilize occlusion, then proceed with whitening, provisionalization, and final veneers or implant prostheses.
Cost Factors and Financing Options
Your total cost depends on which treatments you choose and how many teeth are involved. Veneers alone can range widely per tooth, whitening is relatively low-cost, and implants carry higher fees for surgery and parts.
Location and clinician experience also affect pricing. Materials and procedures change the budget.
Porcelain veneers cost more than composite. Full-arch implants cost more than single-tooth implants.
You may need preparatory or restorative work, such as crowns, root canals, or gum contouring. These additional procedures add to the invoice.
Insurance rarely covers purely cosmetic work, so plan accordingly. Ask your provider about any restorative elements that might receive partial coverage.
Document diagnoses and codes to submit for reimbursement where applicable. Consider financing and payment strategies to spread costs.
Options include:
- Flexible dental office plans (in-house monthly payments)
- Third-party medical/dental credit cards (zero-interest promos sometimes available)
- Personal loans or low-interest lines of credit
Compare interest rates, fees, and term lengths before committing. Request a detailed written estimate that breaks down fees by procedure and stage.
Ask about phased treatment to manage cash flow. You can prioritize whitening and a few veneers first, then add implants later.
Confirm how incremental work affects aesthetics and long-term outcomes.